Shaders
One of my favorite aspect of game making is playing around with shaders ! Here’s some recent art with explanation !
Godot Grass Shader
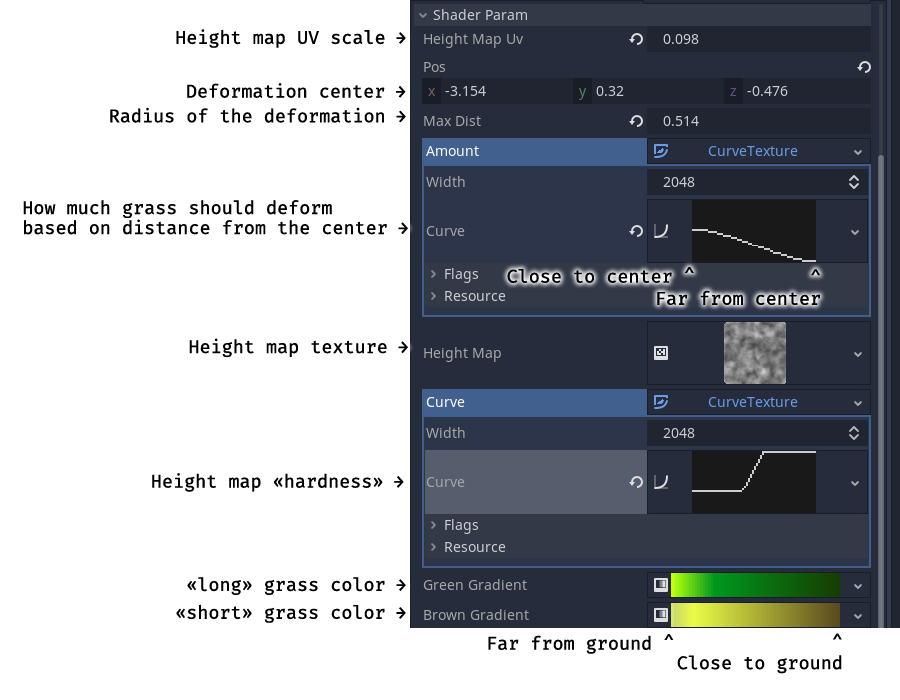
Godot supports curves and gradients as shader parameters out of the box ! Unlike Unity…
Godot Snow Shader
The main challenge of this shader was to know how to interpolate between two materials dynamically. A dynamic texture act as canvas where a smooth brush paints over it, following a moving object. This trick allows any numbers of objects interacting with the canvas. The snow shader got a little vertex offset to give a coat aspect.
Unity Seaweed
Each seaweed has a random color, oscillation frequence, amplitude and direction based on its position.
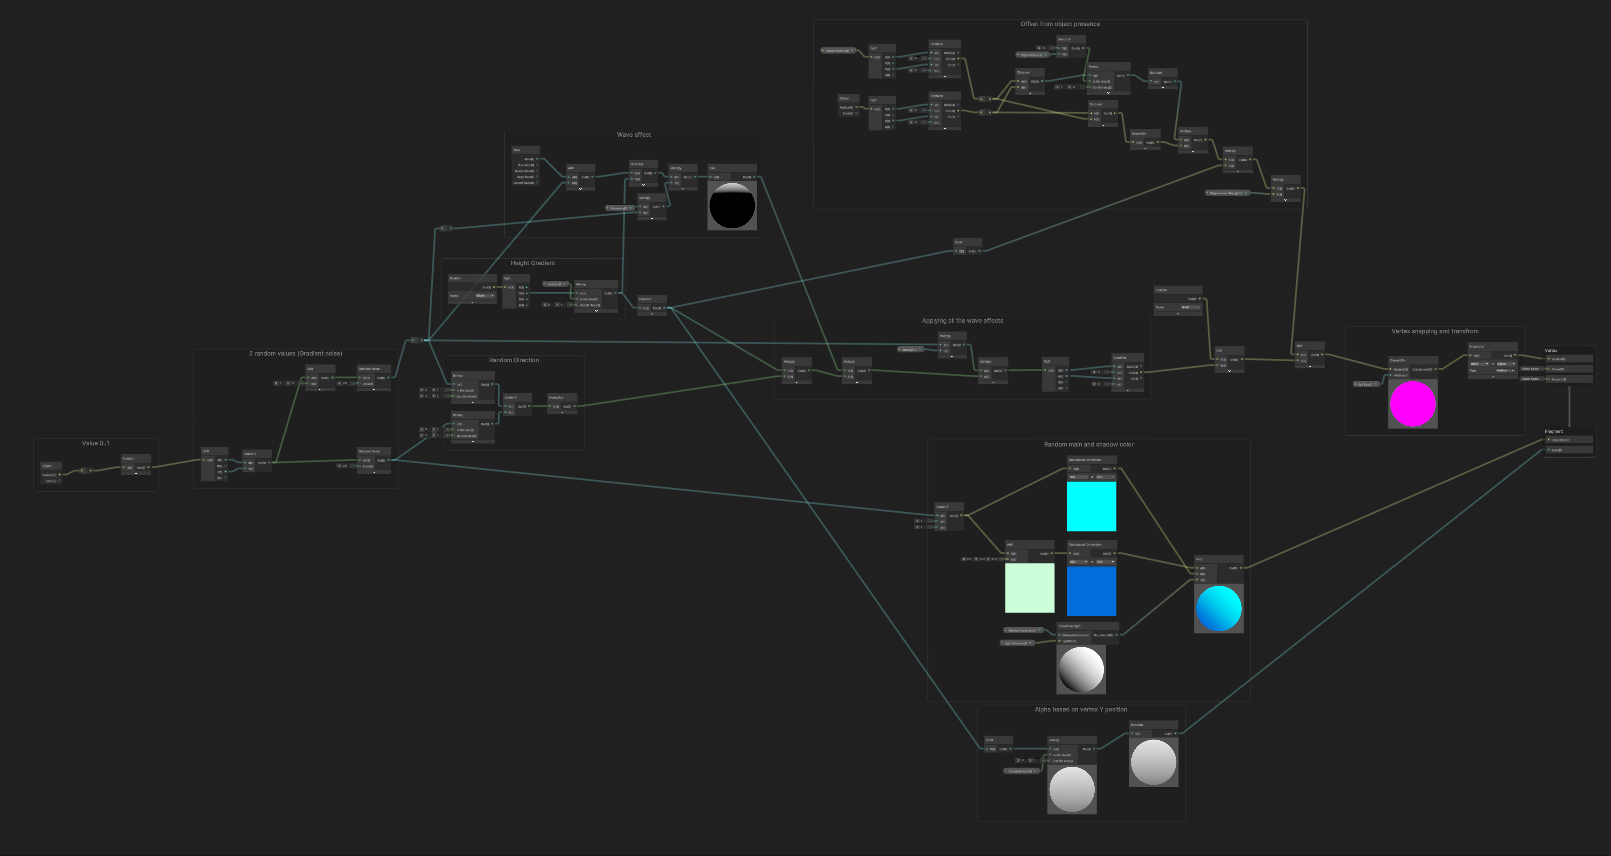
This graph is big and convoluted, let’s break it down
Random pool
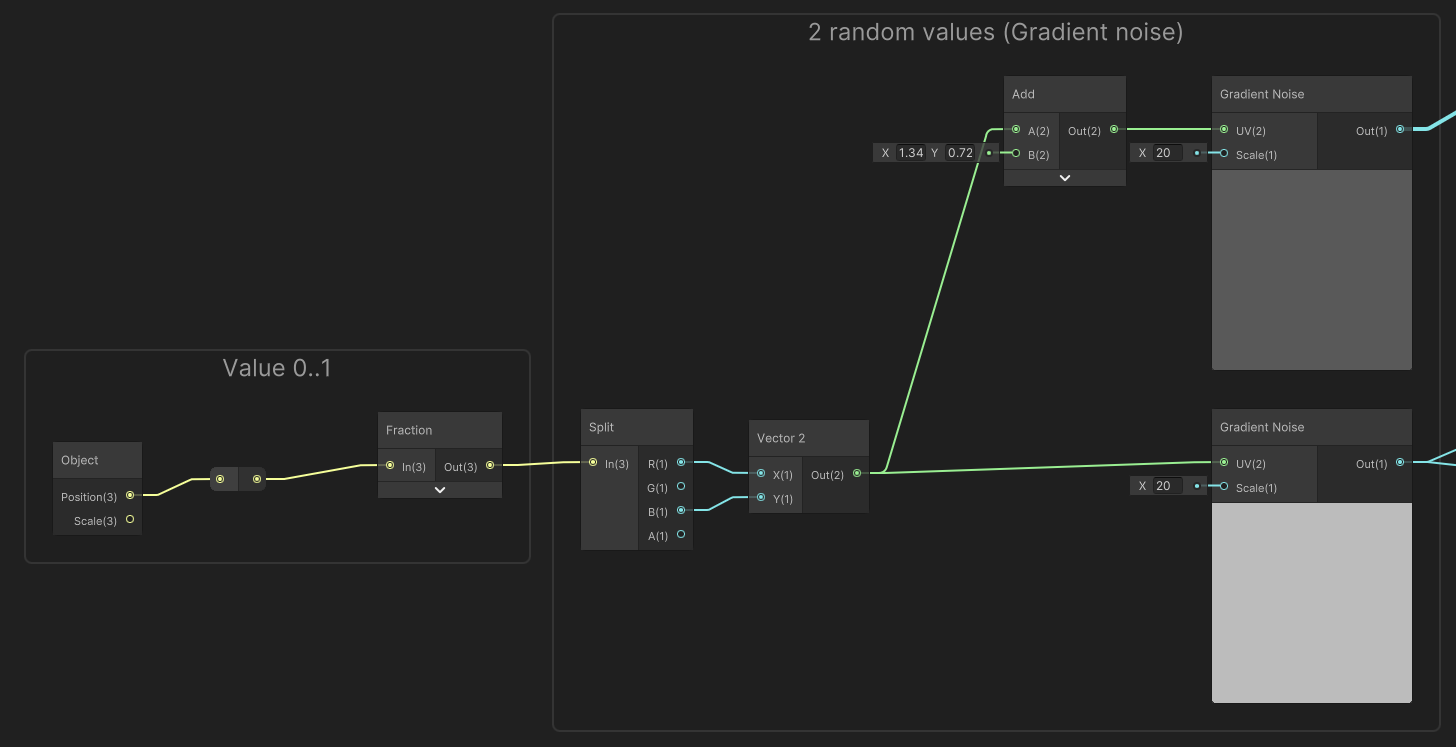
The core of this graph : Random values. 2 random values are generated based on object position in the world. Its X and Y coordinates serves as seeds while “sampling” a gradient noise
Height gradient
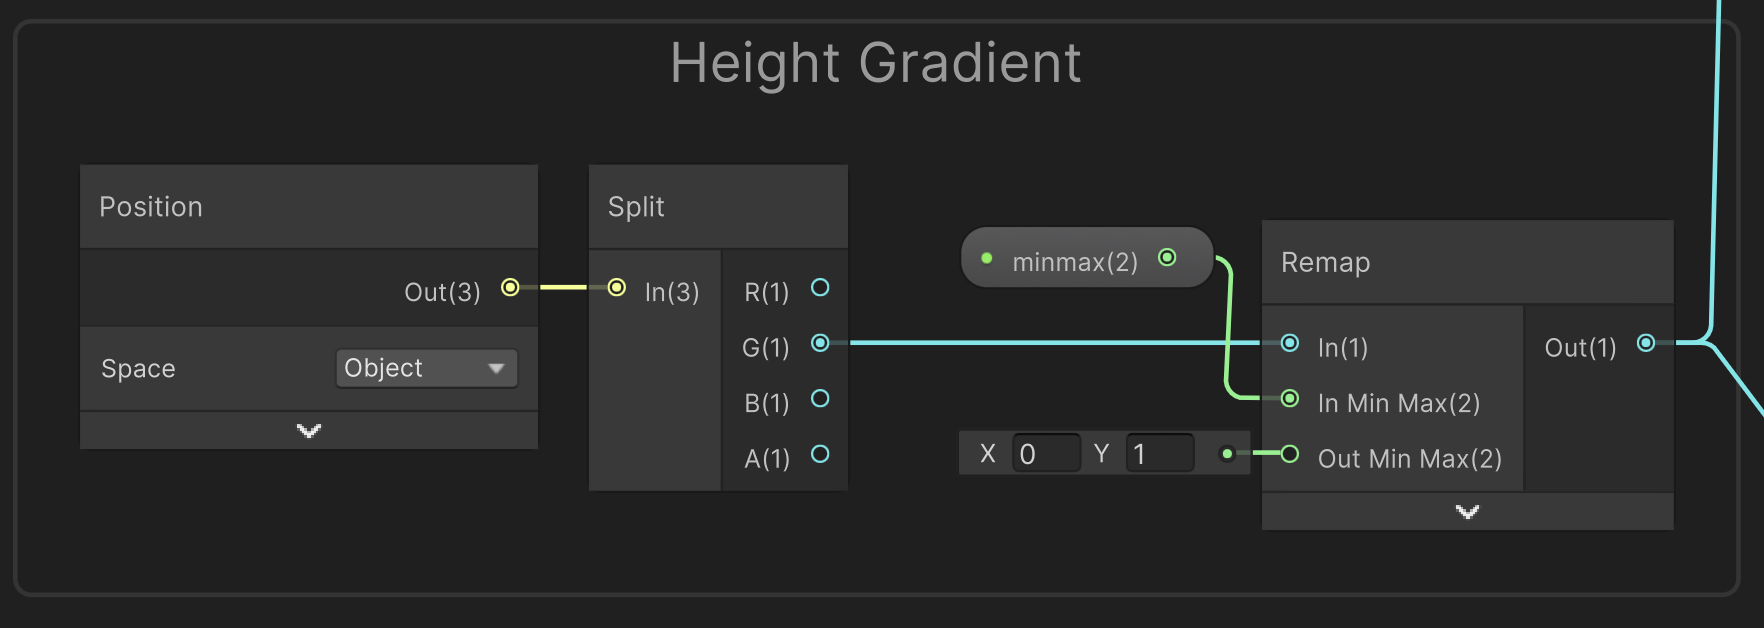
Remapping world space height of the object to a 0 to 1 range.
Fragment shader
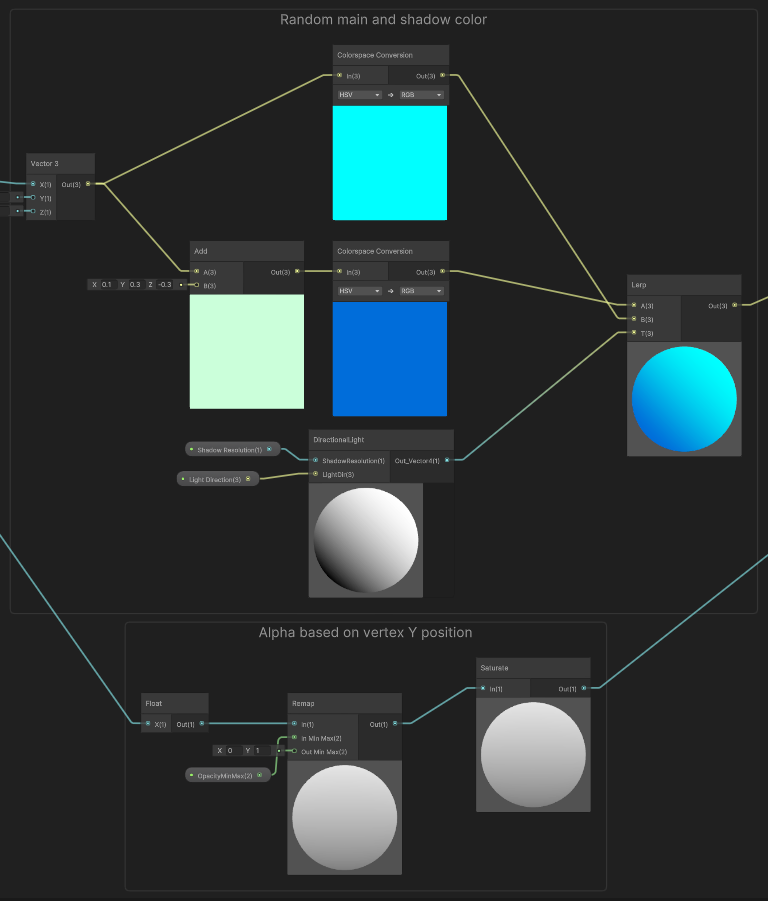
For the color, the Vector 3 input must be interpreted as a Hue/Saturation/Value color, with Hue from a random value. The shadow color is created from this base color by increasing saturation and reducing value (It usually gives good results). We simply interpolate between the main color and the shadow color according to the “light value” the fragment has.
To avoid weird ground intersection and to add a “ghostly” effect, the opacity varies based on height.
Wave creation
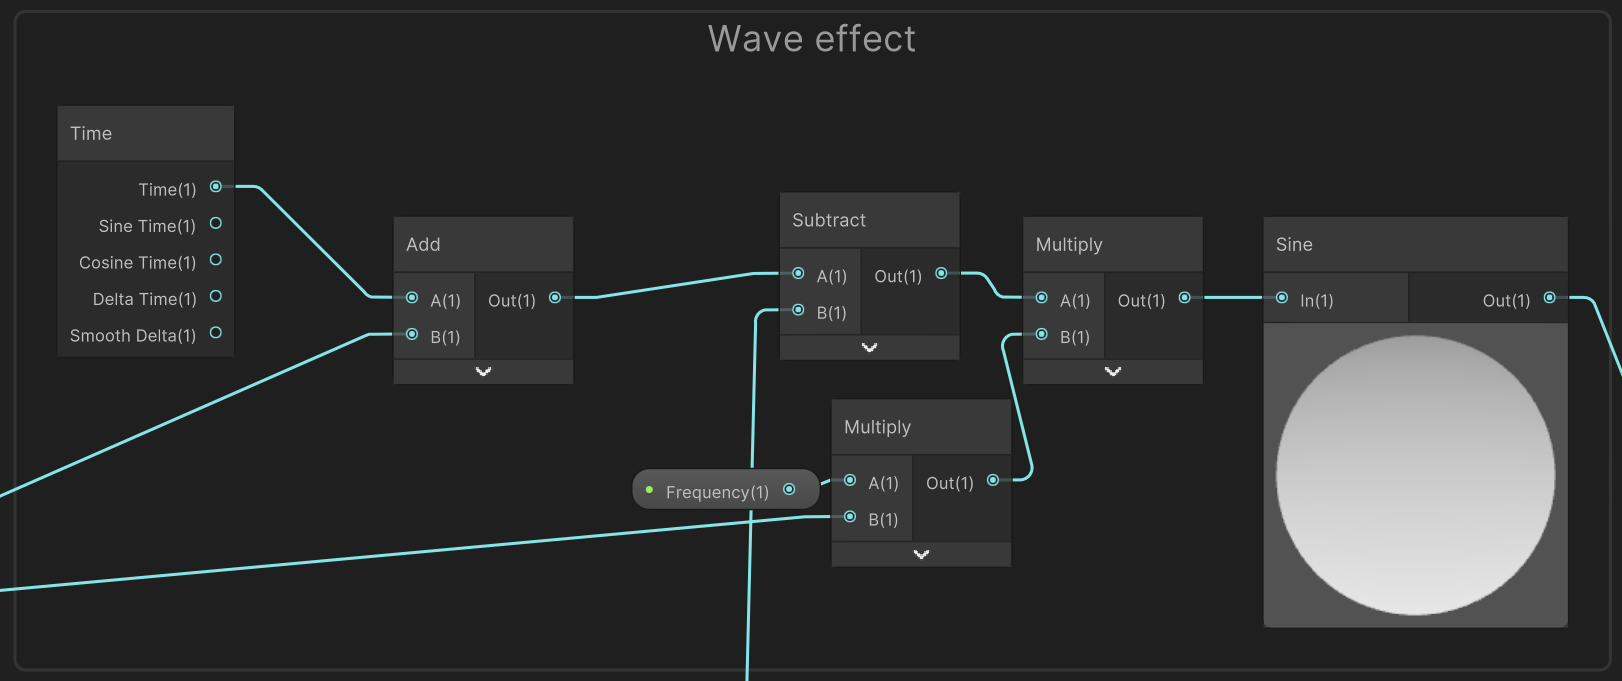
The time node gives us a way to get an increasing variable, a random offset is created with the addition of a random value. The multiplication of the frequency with a random value gives more variation. The substraction with the current height of the fragment allows the wave to travel accross the object. And finaly the Sine function create the wave itself.
Wave direction
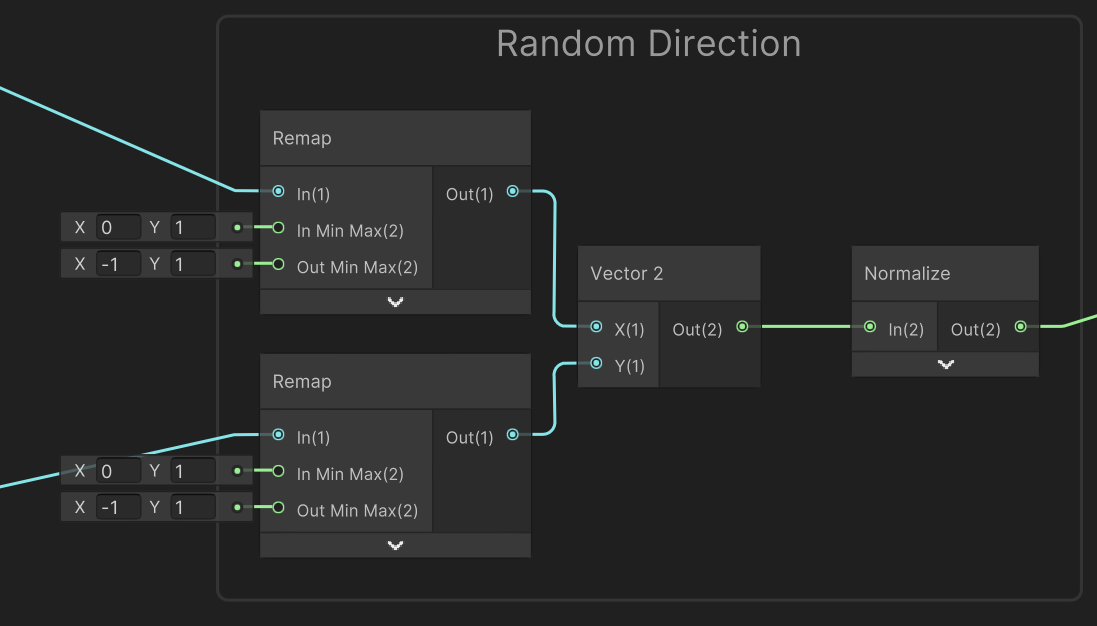
With the two random values, we create a random and normalized Vector 2, giving the direction of the wave for the object.
Vertex moved by player presence
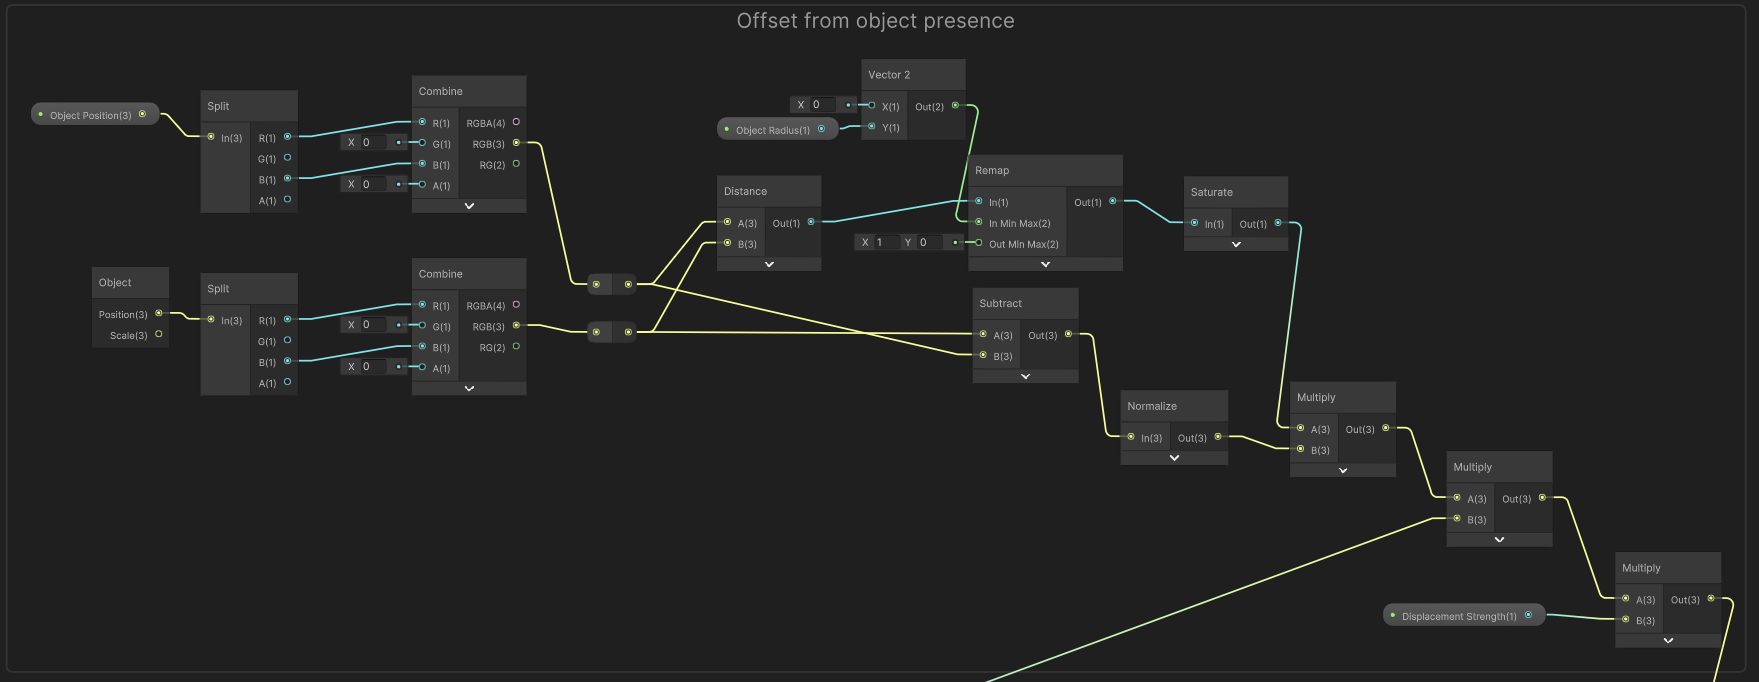
Currently, the shader doesn’t take into account player distance on the Y axis : If the player is way above the seaweeds it will still affect them. This could be resolved with a test of distance, affecting how strong the offset is.
Applying effect

The main input here is the direction vector, it will be multiplied multiple (ah) time in order to modulate its strength :
- The object height : the closest to the ground, weaker is the wave effect.
- Wave : The offset direction strength follows the wave.
- Variation : the last multiplication modulates offset amplitude
Finaly we got our final 2D offset, we split it on the right axis (X and Z), add it to the world space vertex position. Then we add the player presence effect. One last effect : the “ClosestDiv” node recreated PS1 vertex snapping (Absolutely not accurately, but the effect looks great anyway), allowing vertices position to be on a settable 3D grid. To end this tentacle monster, we transform world space position to object space position.
Unity Retro Post Processing
Unity’s URP doesn’t provide a simple post processing effect pipeline, but thank to this article from Febucci, things are made easier.
With this tutorial, a new pass is added to the render pipeline, allowing any material to be used as post processing effect.
I created two materials with shader graph recreating a CRT effect :
- RGB channel offset
- Scan lines and color bleeding
And a final touch is added with an already existing pass, a lens distortion, simulating old tv screen curvature.
Only the two first effects are displayed in this video.
RGB channels Offset
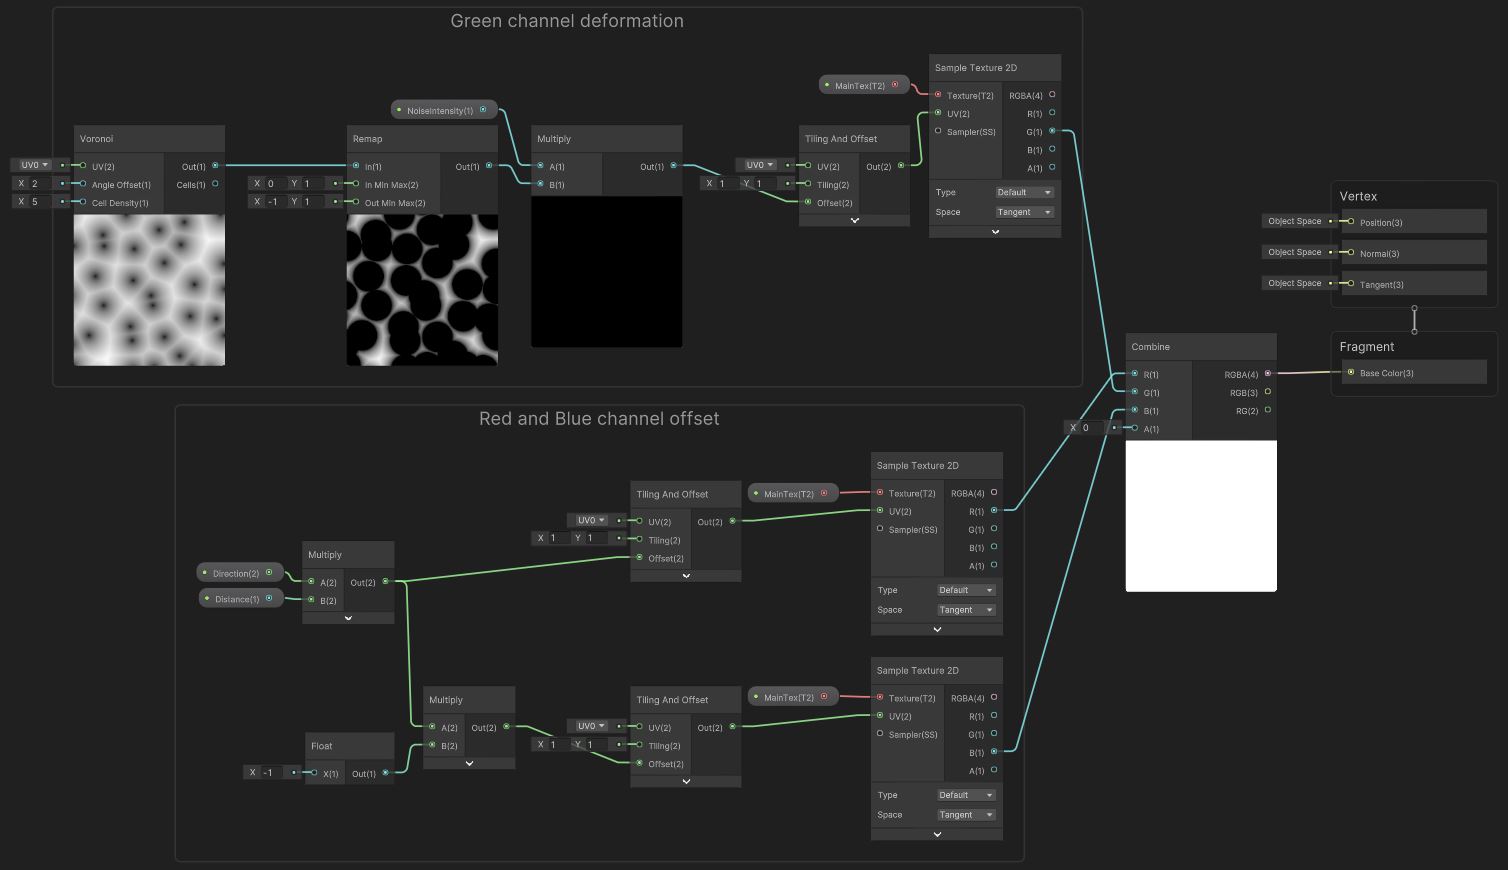
Shadergraph from the RGB channel offset post processing effect.
- The frame green channel is deformed based on a voronoid texture. The original pixel position is moved towards either bottom-left or top-right based of the value picked on the voronoid texture. Only one direction is available, good enough for the effect. The strength can be set with a slider.
- The whole red and blue channel are moved, there’s no “per-pixel” translation. The red channel is moved in a direction set in the parameters and the blue channel in the opposite. The strength can also be set in the pass parameters.
Scanlines & color bleeding
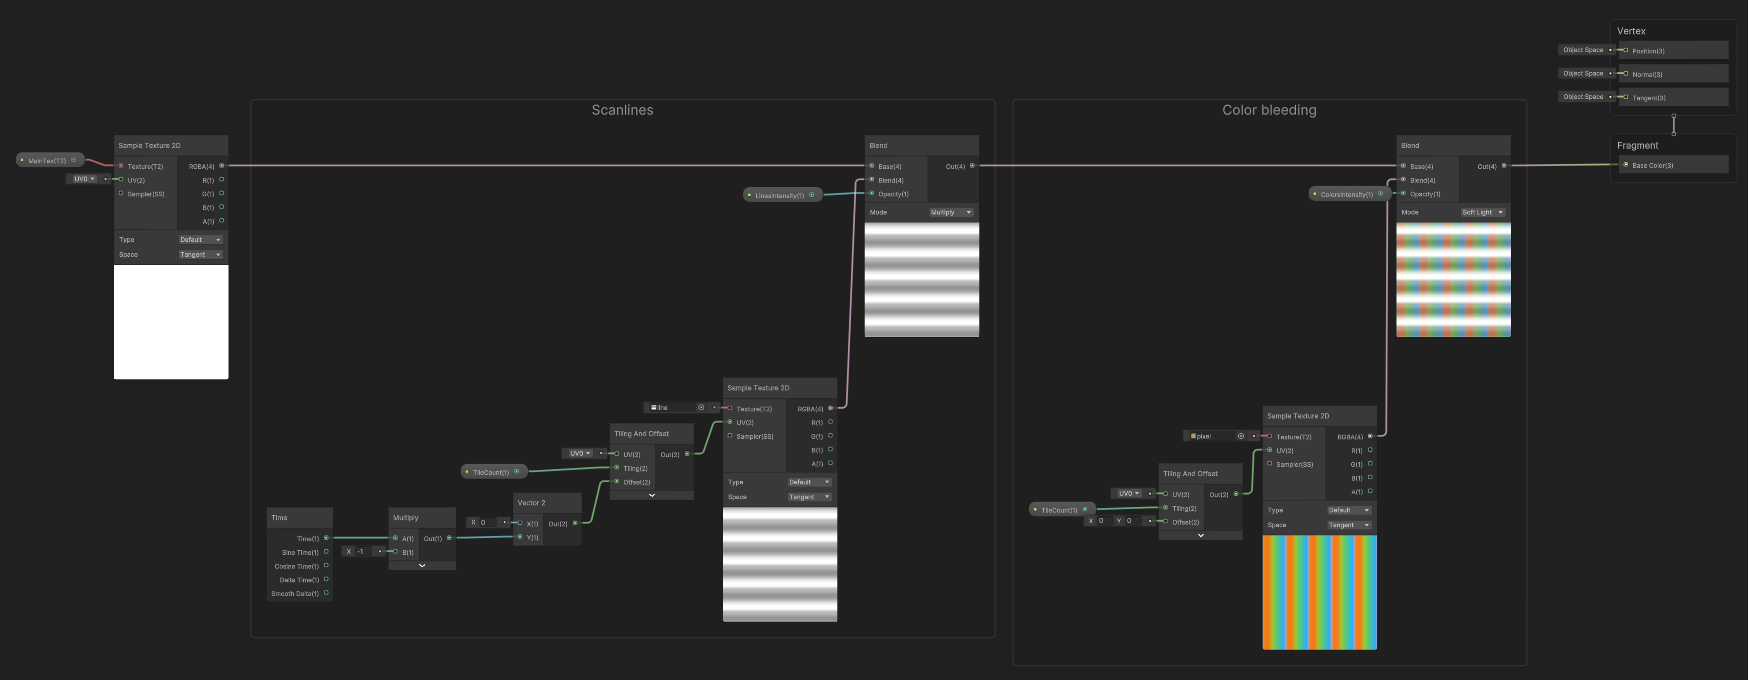
Here, two textures are tiled and blent with current frame. The scanlines scrolls thank to an offseted by time sampling.